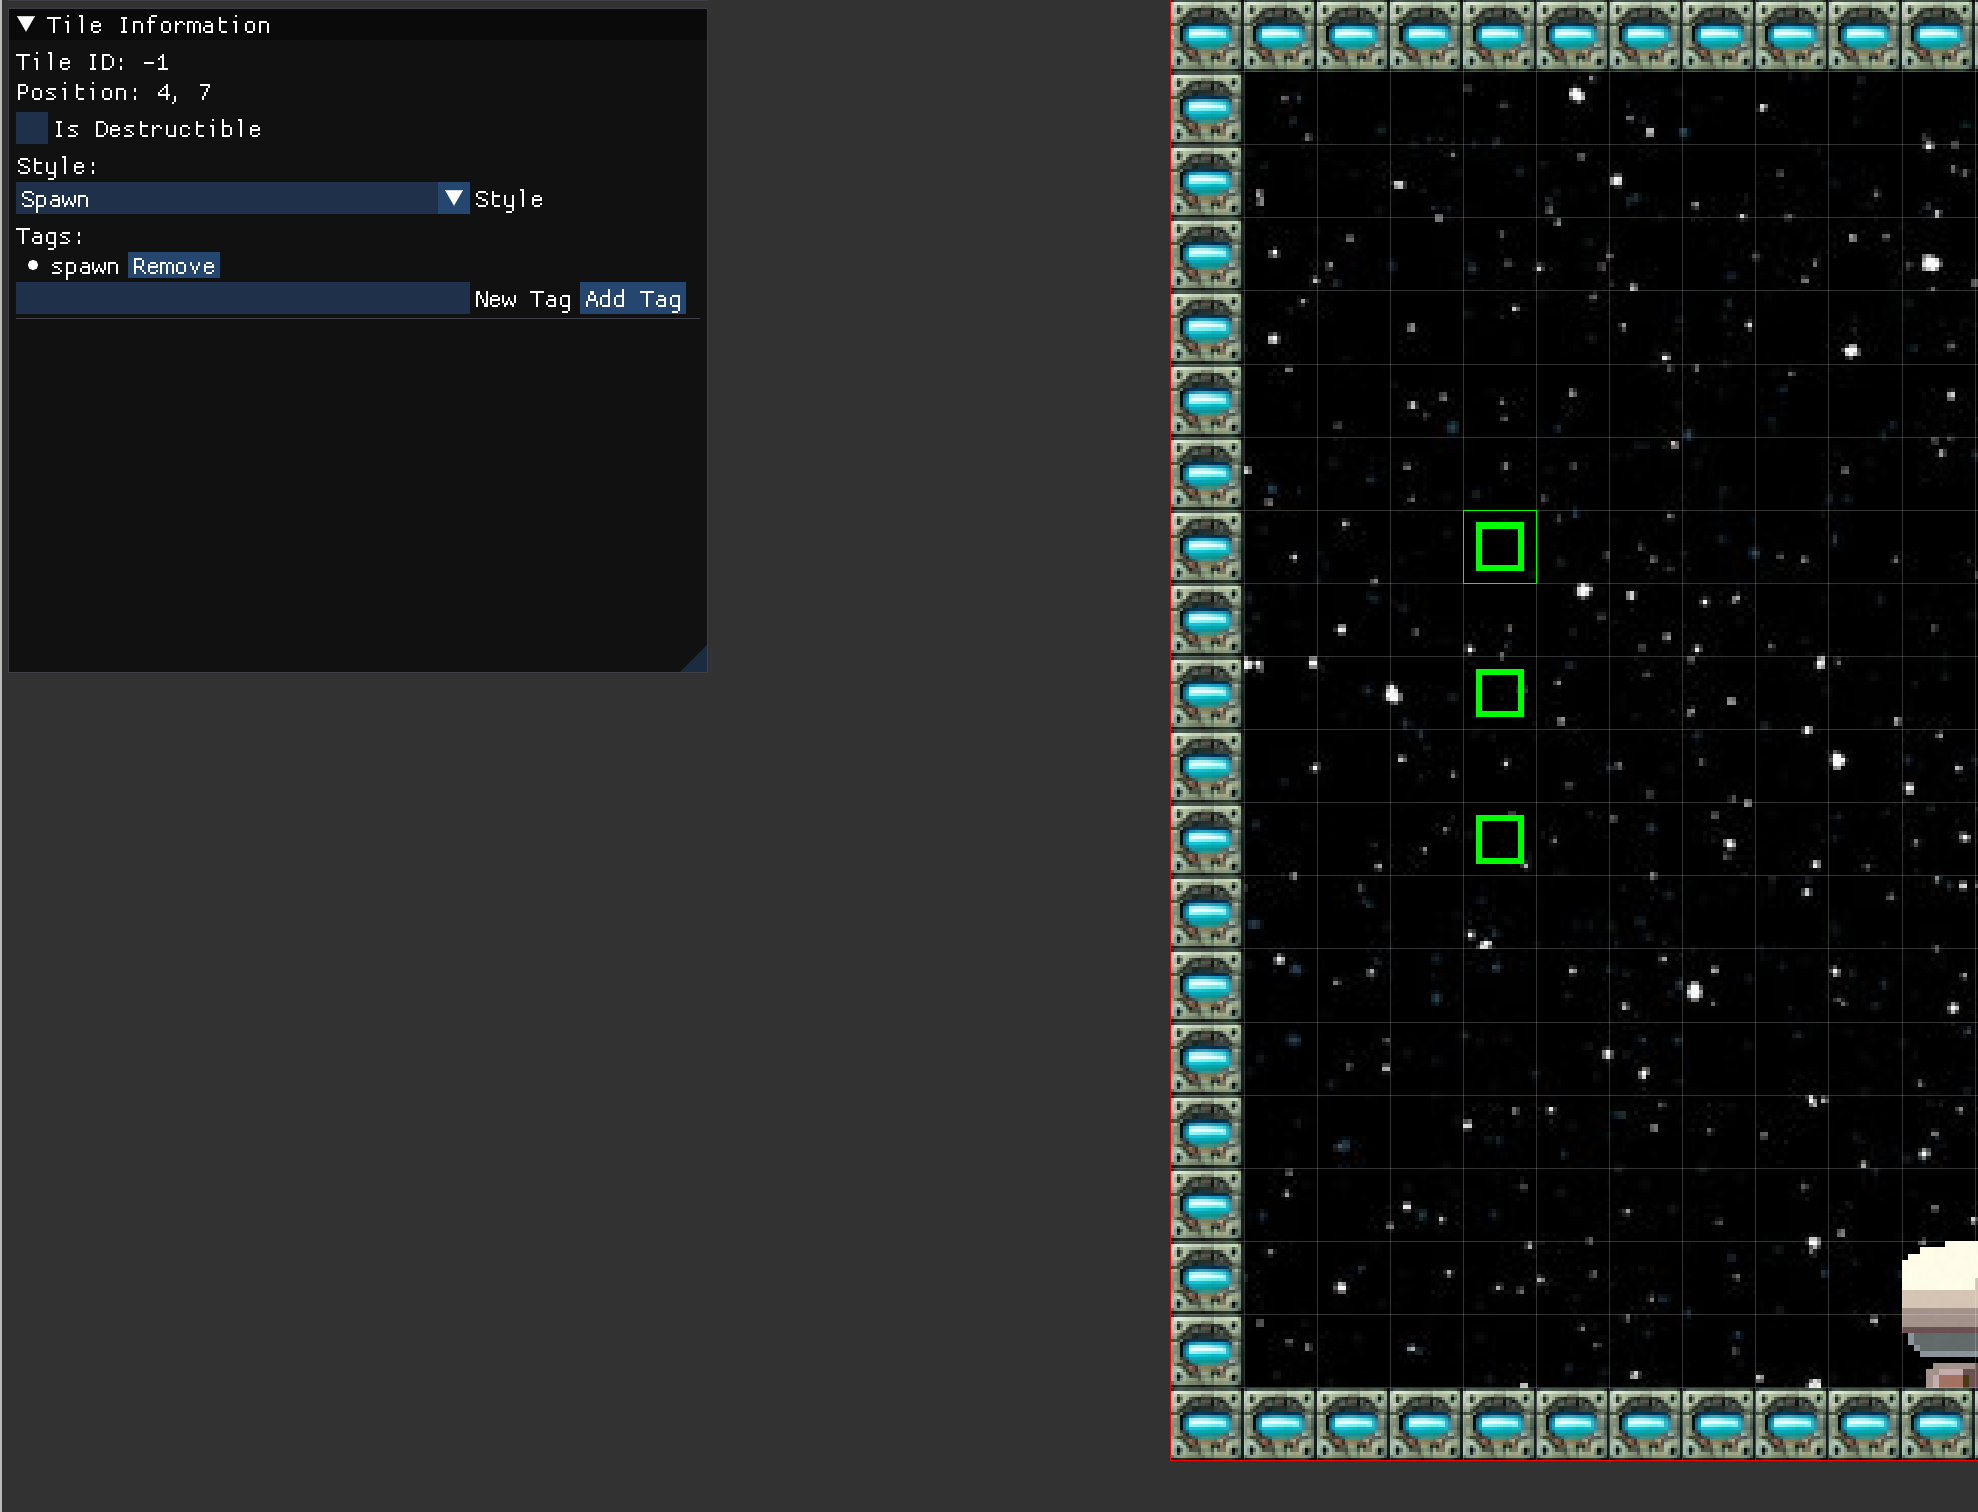
Adding Tags and Modifying Tile Styles
This guide explains how to add tags and modify tile styles in the map editor.

Selecting Tiles
- Use the "Selector" tool in the editor.
- Click and drag to select one or more tiles on the map.
- The selected tiles will appear in a list on the left panel.
Modifying Tile Styles
- In the left panel, locate the dropdown menu for the selected tile(s).
- Choose a style from the dropdown menu.
- The selected style will be applied to the tile(s), helping to visually categorize different tile types.
Adding Tags
- Find the input field for tags in the left panel.
- Type the desired tag into the input field.
- Click the "Add Tag" button to apply the tag to the selected tile(s).
- Repeat this process to add multiple tags to a tile.
Setting Destructible Property
- Locate the checkbox labeled "Destructible" in the left panel.
- Check the box to mark the selected tile(s) as destructible.
- Uncheck the box to mark the tile(s) as indestructible.
Tile Configuration in JSON
After modifying a tile, its configuration in the JY_map.json file will look similar to this:
{
    "isDestructible": true,
    "style": 0,
    "tags": [
        "spawn"
    ],
    "tileIndex": 107,
    "x": 0,
    "y": 0
}